Byllan SLAC - my 1st Stickless Fightstick Pt.2

Making Of / 01 April 2020


To take it even further, I added a few ports and switches...


... more switches and ports also means more wires! 
I used tape to put a few UV-LEDs in place for testing, which was replaced by hot-glue later on (so it looks more official) ;)


Its not easy to catch on photo - but I think you get the picture, haha - now I can find the action buttons in the dark.


I was adding a switch on top as well - the red one is the good old "turbo" switch. Another sticker found its way as well...

This concludes the making of my custom SLAC -  the Byllan-SLAC !
I hope you enjoyed this blog...


See you on the next one - take care!


Byllan SLAC - my 1st Stickless Fightstick Pt.1

Making Of / 01 April 2020

from these parts, I started to craft my first controller - a so called hitbox - or "stickless fightstick" - in short SLAC...

Nothing too special here, a good circuitboard, some high quality buttons and some wires.... and well - there is the unusual housing.
This is from the IKEA collection and is normally used to put it on your lap and place your laptop right on it - hahah ;)

I thought, this would make for a cosy and smooth SLAC case - slacking case ^^ - and it comes with a handle as well !!!


I made a mirrored copy of the button layout (which I did in CAD app) to drill out the holes for the buttons - every button fits fine!
Glad I've bought special "Faustner-drills" - they did a precise job on this... oh - and this layout is custom tailored to my (large) hands.
I wanted a larger button for my thumb + in a more relaxing position, then typical standard layouts.


After taking care of the buttons, it was time for a first, rough wiring...  and quick testing - all buttons did work, yeah!
So far so good - but what about a housing for all this buttons and wires? Could not leave them open, of course.
I thought, this would be a good case (haha) to go for a 3D printed - well case (looks more like a bowl, itsn´t it?)
Unfortunately, I did a mistake when designing it in blender... the result were some "elevation lines" as you can see
in the lower left image... but it does its job well ! Big shout out to "Mad Chrissel" for doing the printing on his Prusa MK2.


Now - this is, how it looks, all put together. Very clean and comfy...


It appeared a bit too clean to me, so I decided to put on some decals or stickers, if you like. Now everybody can see, what board I have inside ;)

... so this should be it... but... no ! After a few days of use, I decided to take this even further


OMG here they come !!!

General / 27 May 2019

Dear readers, it´s been a while since my last entry. I had a few very busy month (which is a good thing)
and I honed some skills, learned new software and workflows... you may know the drill ;)

Now, this time I´d like to present some "off line" skills - I took the chance, painting some miniatures!
Yes, that´s right - no CG involved. Just some acrylic paint, a mix of different brushes to choose from
and of course: Miniatures. To me, this is kind of a cool hobby and a very relaxing and rewarding one, as well.

As an artist, I really love the level of detail but maybe even more, how they are posed.
The artists have done incredibly well, I think!

It was my first time ever, to hand-paint such small objects - I really hope you enjoy my
small but growing collection. I got some more in the works, already!

But for now, here they are - my first tabletop game-ready painted warriors and wizzards....


Starting off with the Stormcast Eternals warband:

Mostly shiny armour and weponary here - i was going for a clean and uniform look, pretty much like suggesed by the books and illustrations...

...what an impressive small elite-troop !!!


For the bases, I did go with nothing too fancy...


Followed-up by the Nighthaunts: The thorns of the Brian Queen

For the nighthaunts, I tried a technique called "Dry-brushing" - basically I tried to blend the green, gloomy areas with white ones. I liked the metal parts to look rusty and old - I used dark shading color and a "technical paint" called "Typhus corrosion"... for some extra "chain-raspiness" :)

Roses have thorns...


This time, the bases were a little bit more complex and detaiiled.


Speaking of detail(s); what´s a chainrasp without a chain? 

Yeah, so here is a detail-shot of some chains:


And last but not least, I decided to venture into 3D printing - nah - just dip my toes a bit:


This little thingy here, should serve as kind of dangerous portal / board marker, that sucks in the living - for usage with tabletop games. I also palnned a few more, so stay tuned!


3d model - ready for printing


This is how the printed model looks like


And this is how it could look, when painted (CG mockup) 


I hope, you enjoyed this little blog-post and I wish you all the best! Hope to hear from you , soon!
  - Karsten


My 1st photogrammetric 3D scan

General / 12 July 2018

Oh my gosh - this is good fun !


this thing is part of a tree (you guessed it) - and stiched together from 8 images, taken with my iPhone X (in portrait mode!)

the cool thing about this mode: the photoscan software seems to just evaluate the sharp object in the image,m not the blurred borders - this saves a ton of time for masking and calculating! - just wanted you other 'photoscanners' to know...


Oh - this is the original mesh, from dense pointcloud - a whoooping 2 million verts, 3.7m tris, 4k texture from images.


Best,

Karsten

Sketchfab Beverage Can Challenge 2018 - breakdown of my entry "Jet Fuel"

Making Of / 05 July 2018

Werbung: Alle Markennennungen sind unbezahlte Werbung, Marken werden nur aus rein Informativen Zwecken genannt, es bestehen keinerlei
Verträge oder Verpflichtungen mit den genannten Marken!

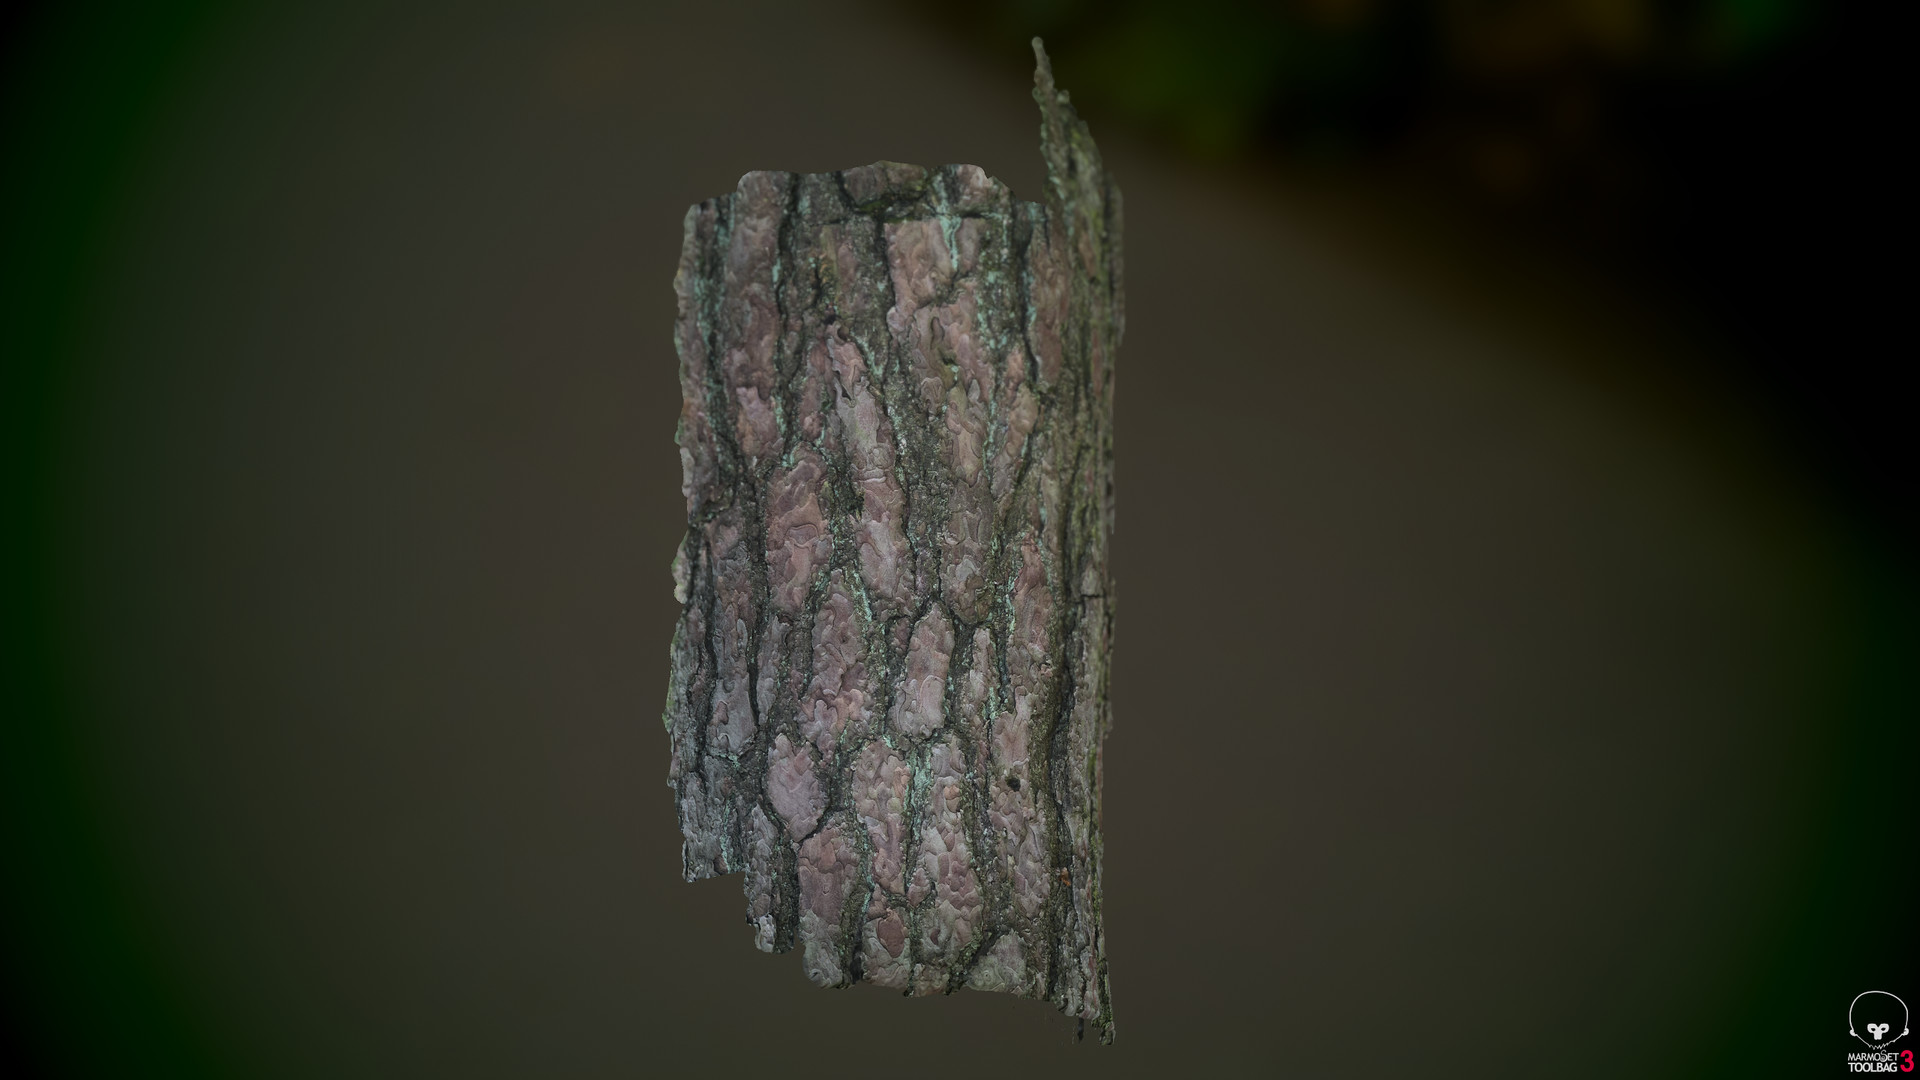
Can by Dark Minaz licensed under CC Attribution-ShareAlike.


hello,


I am not a product designer and not any good at 2D-logo art (both would have been very handy for this project hehehe)
- so I tried to focus on the can's paint-job and fx (like water drops, fingerprints, car-paint-like look and so on)

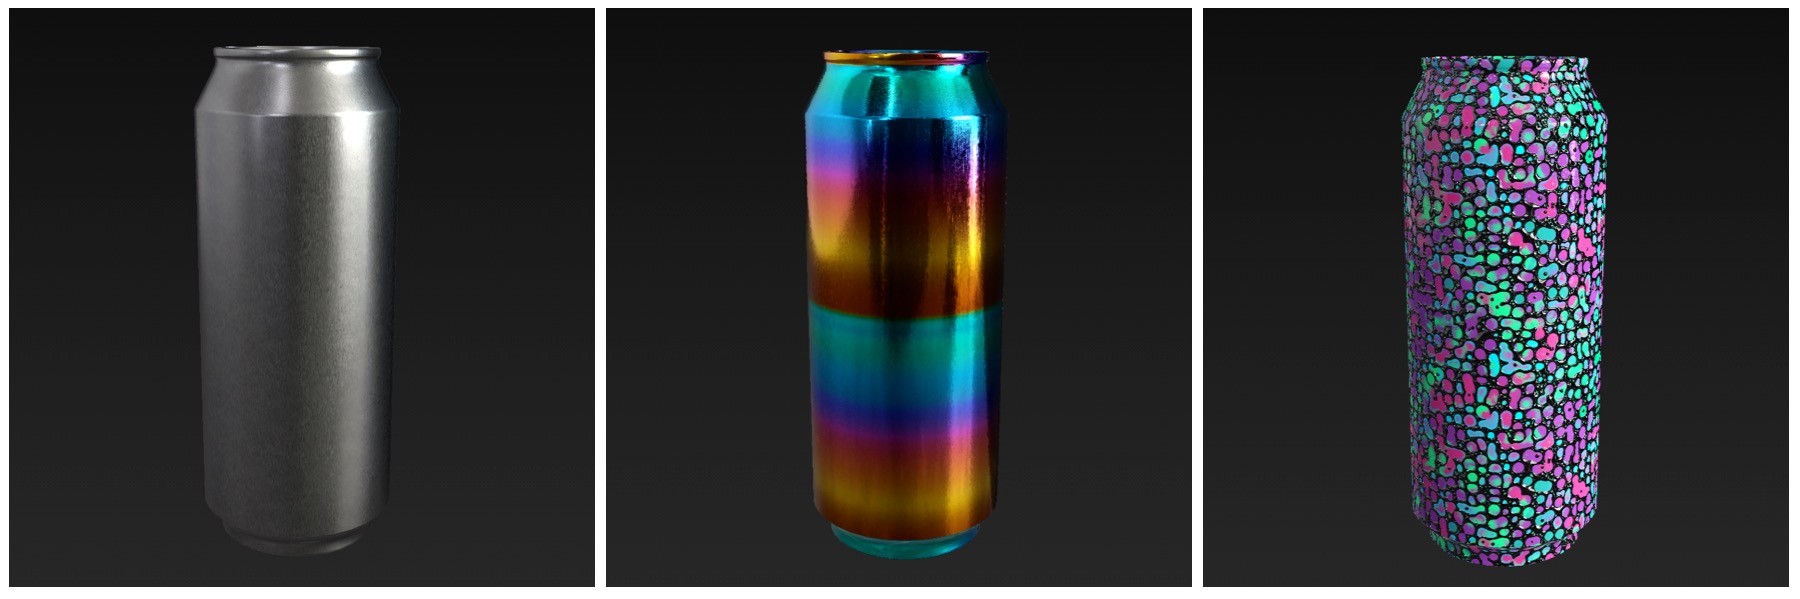
But first things first - I had to find a foundation-base for the can. I went with a brushed-aluminum type of material , very common and found on many cans (and also in the painter library)

Because I don't wanted to go with a "chipped away", beaten up look, I did not apply any other "primers" or something like that.

Later on, the brushed aluminum will be fully visible at the top and bottom of the can - for the rest of it, only the small
brushed pattern will augment the surface.

Ok - base was ready - what now?
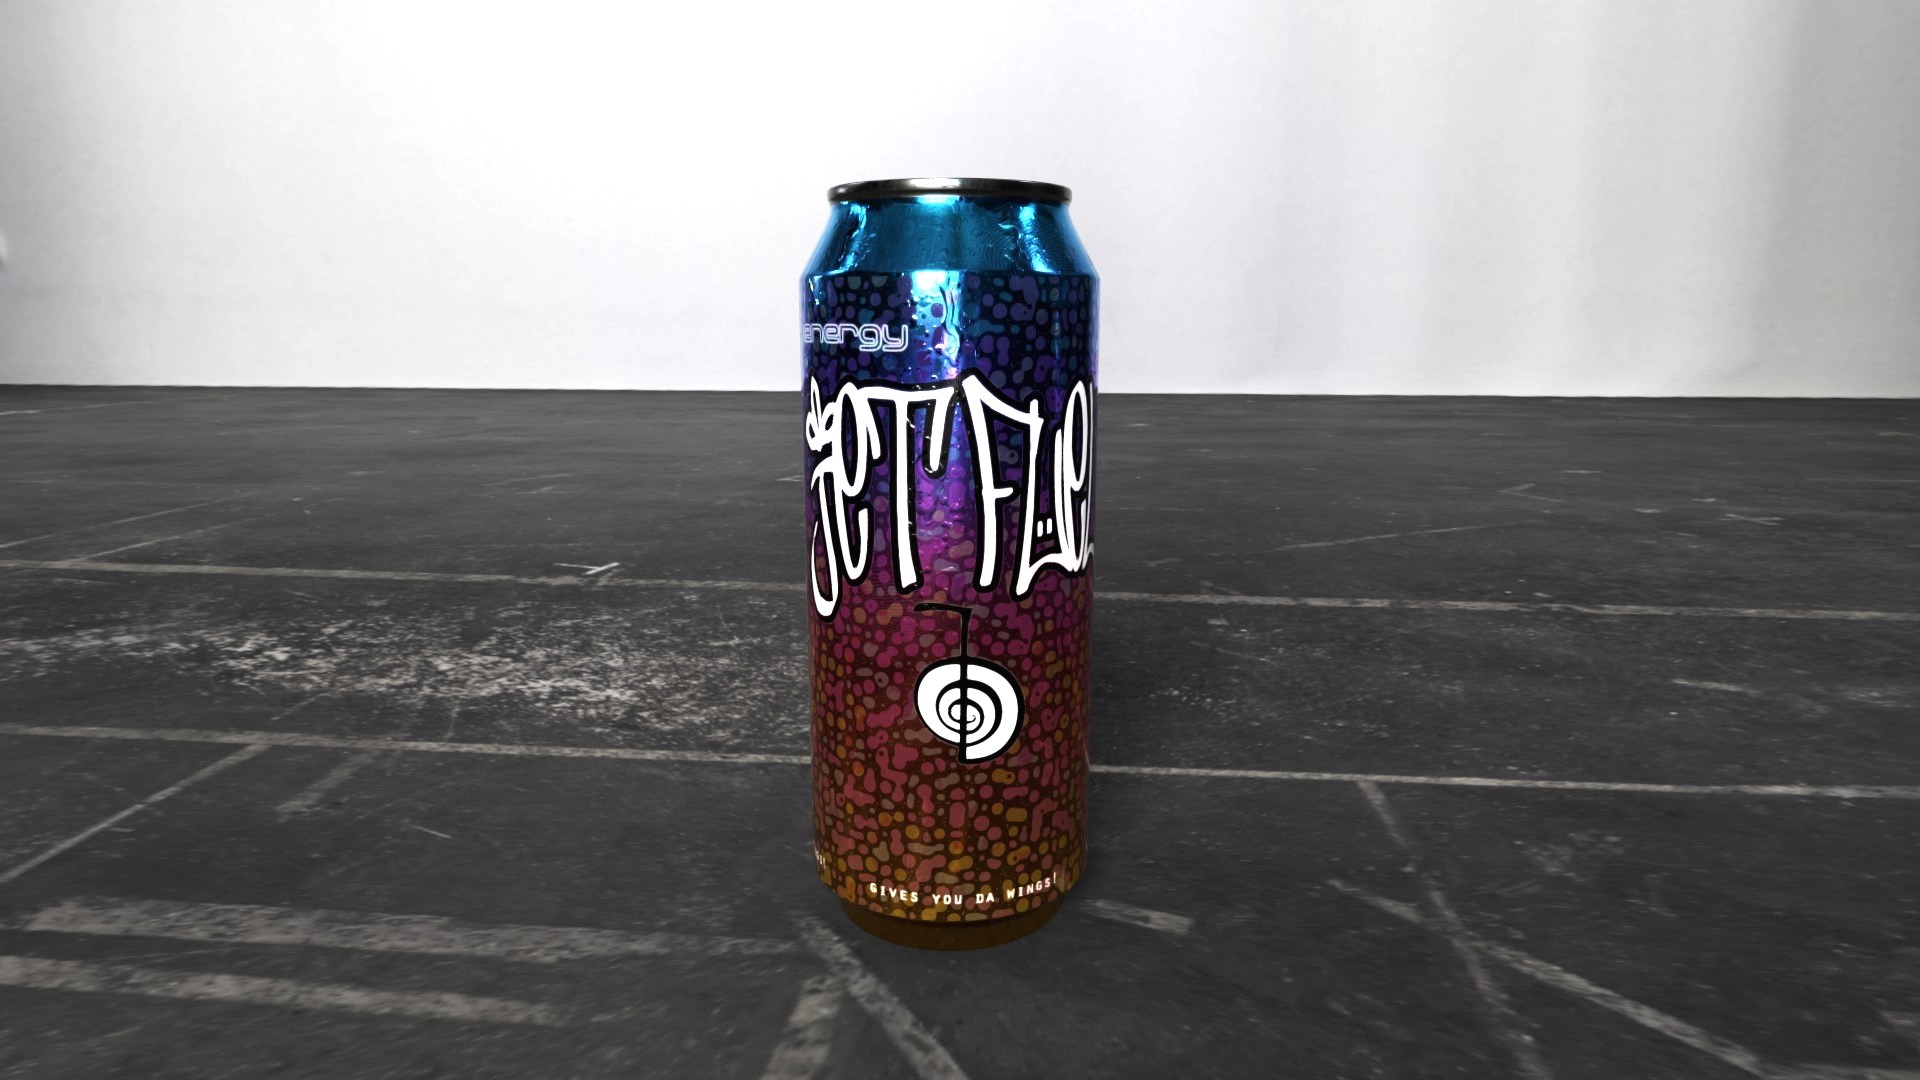
In the past, I build up a BMX bike (was really fun) and I came across some relatively new color: "JetFuel" (sometimes
also referred as "oil slick") Technically , it's not a color or painted in common ways - this is achieved by a special heat treatment to the metal.

For reference: 

I was super glad, to find exactly such a material on the Substance Source library - yeah! After a bit of tweaking, the can got it's 2nd Layer.


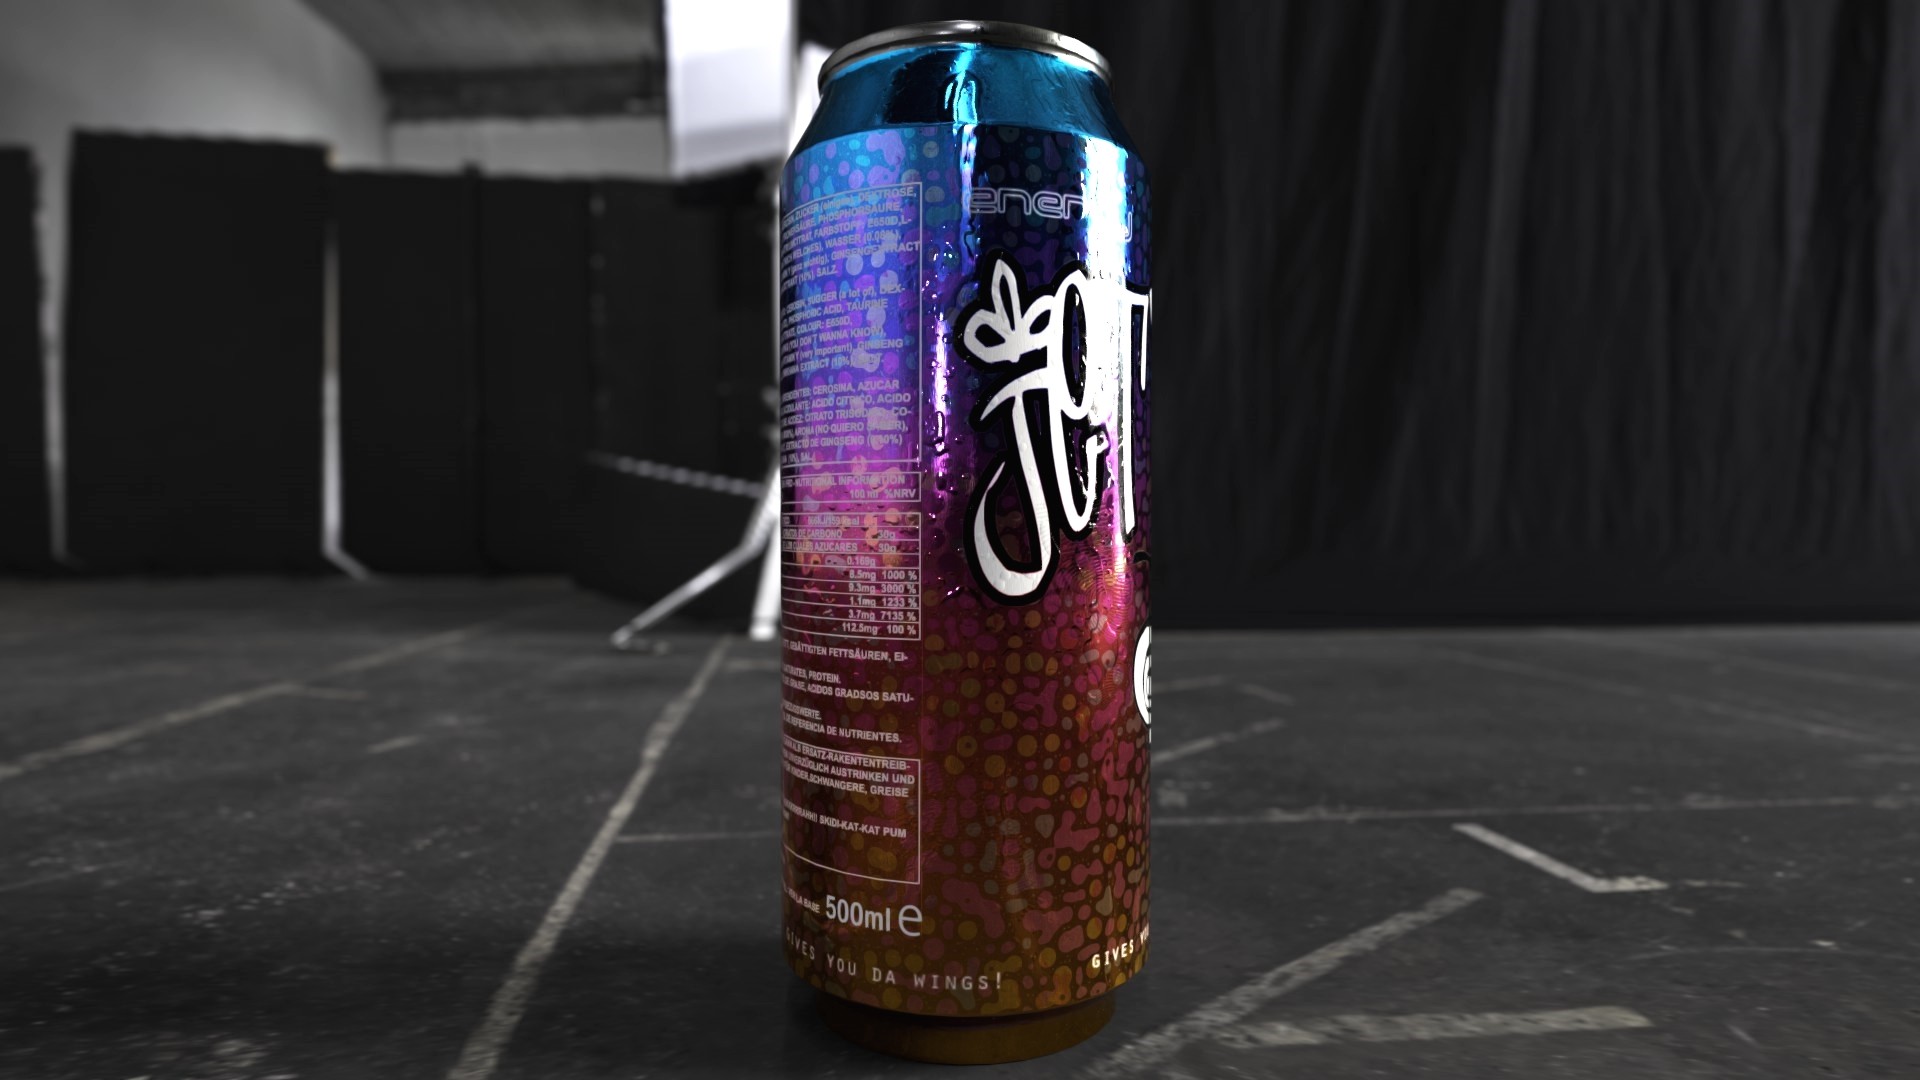
Now, I decided to go a bit crazy (for the "bubbles" version) and put on another (very strange looking) material - magnetic fluid.

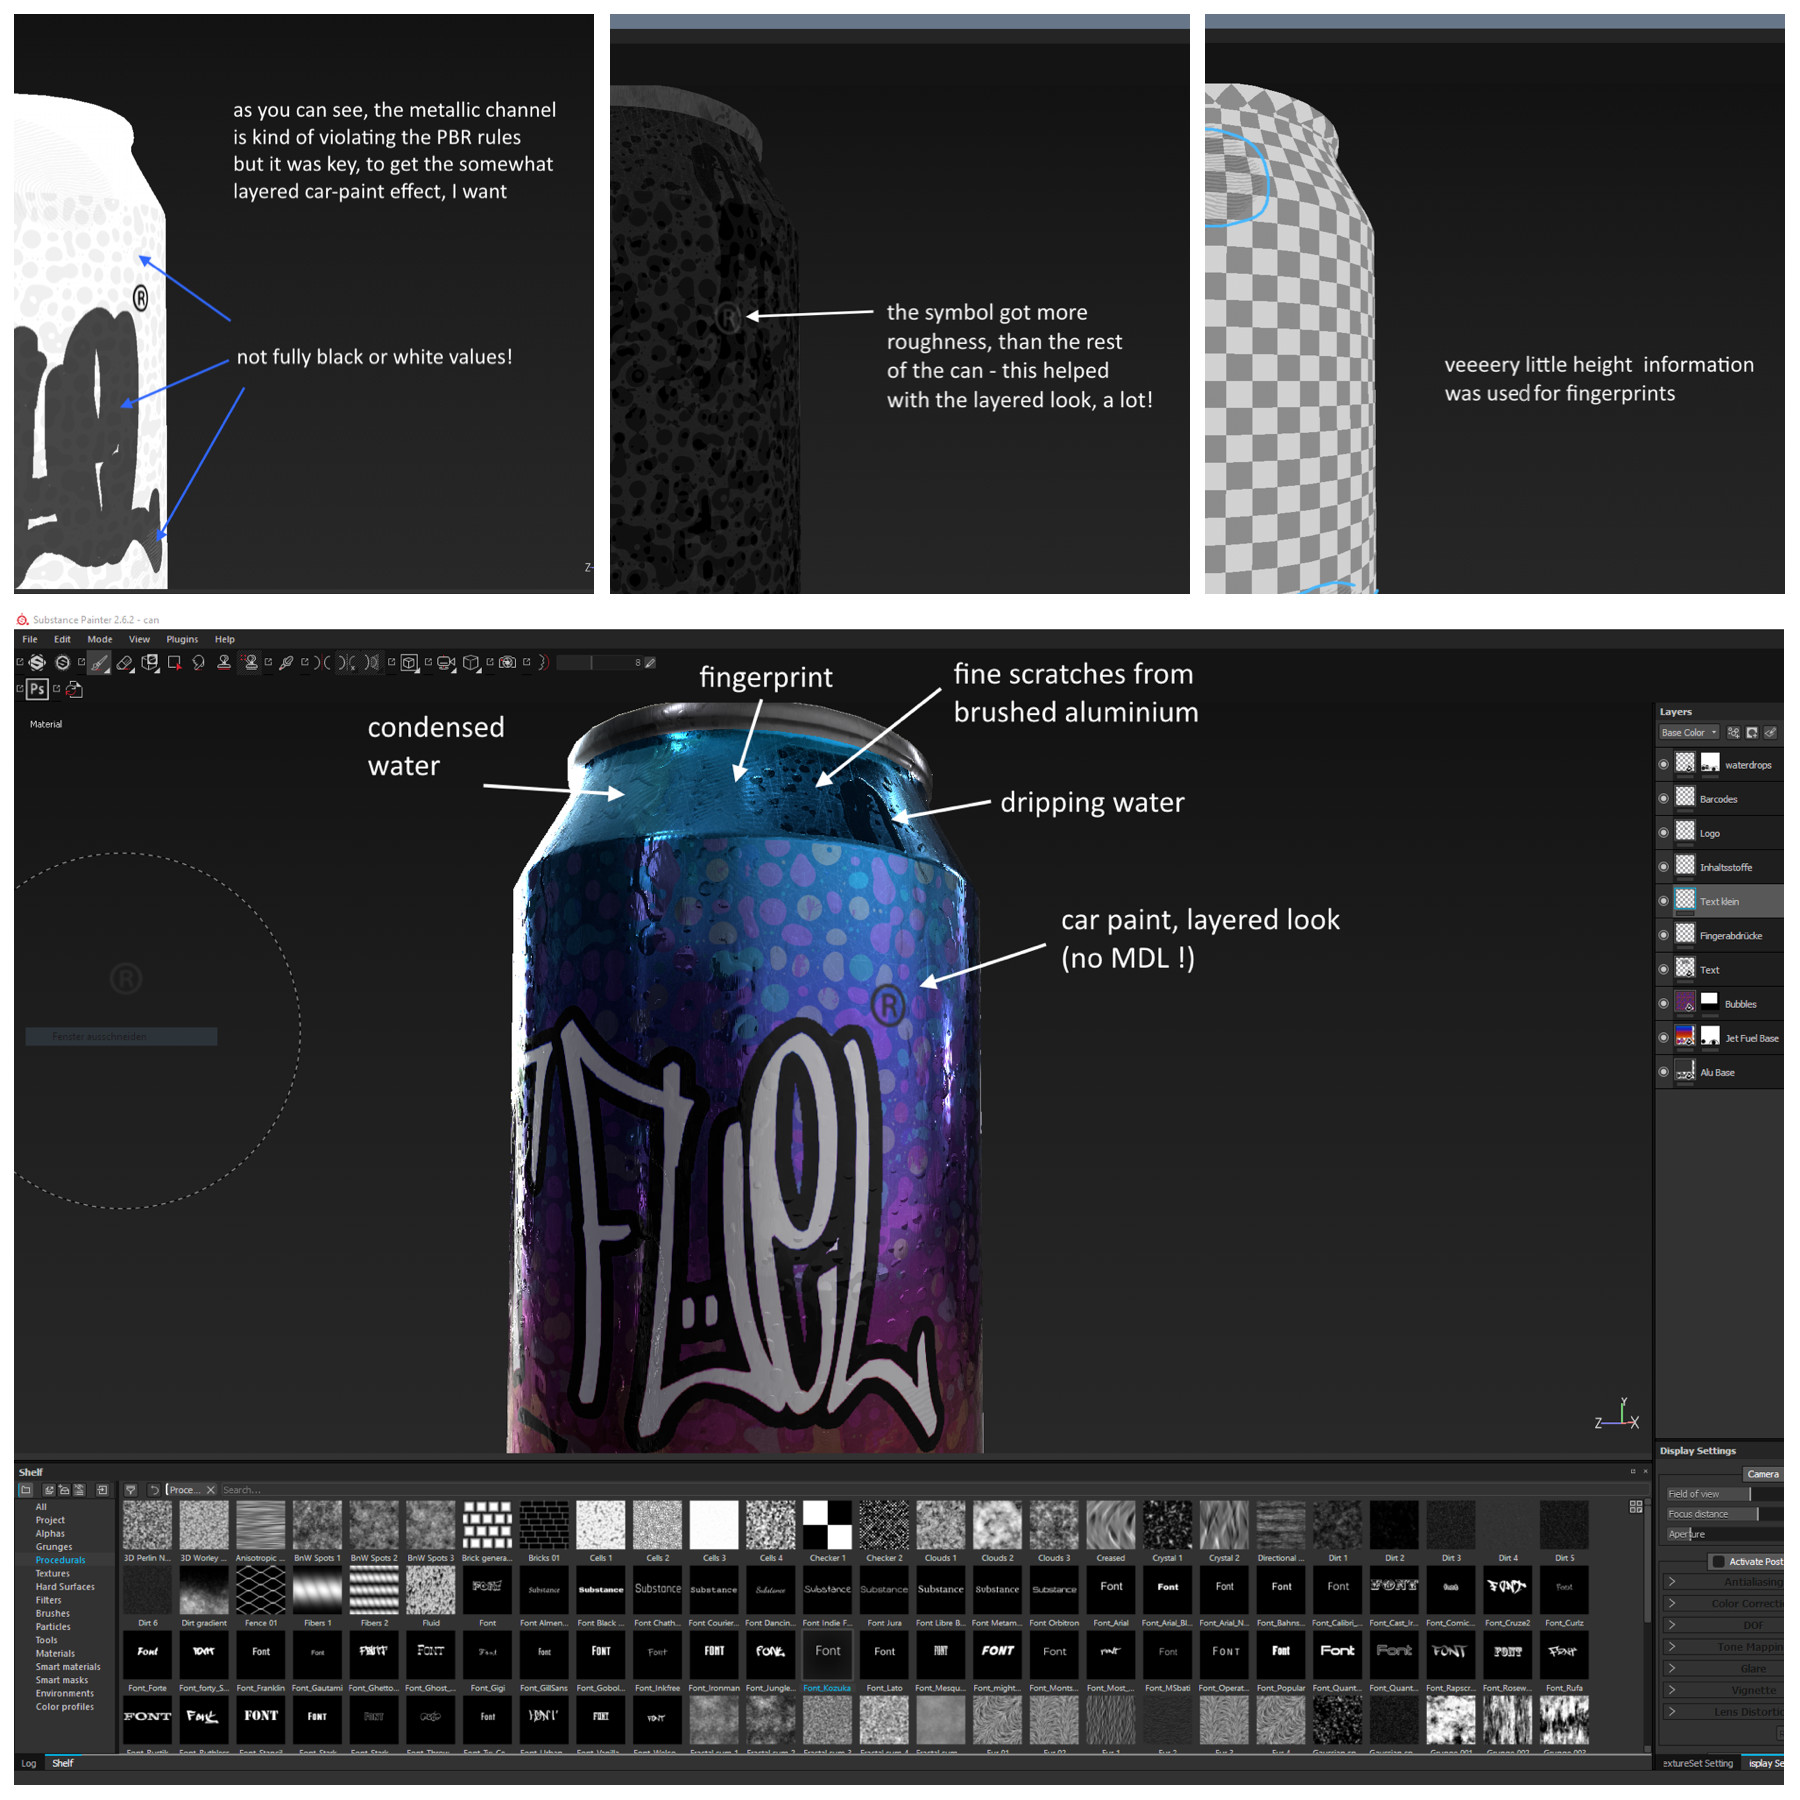
But for this one, I only used the metal and roughness information and tweaked the values until they blended into the jet fuel
material, like I wanted it to. The thing was, not to go rather full metal or non-metal with it (even if this will violate the
laws of PBR). However, this violation turned out to work very well towards the look, I was after.


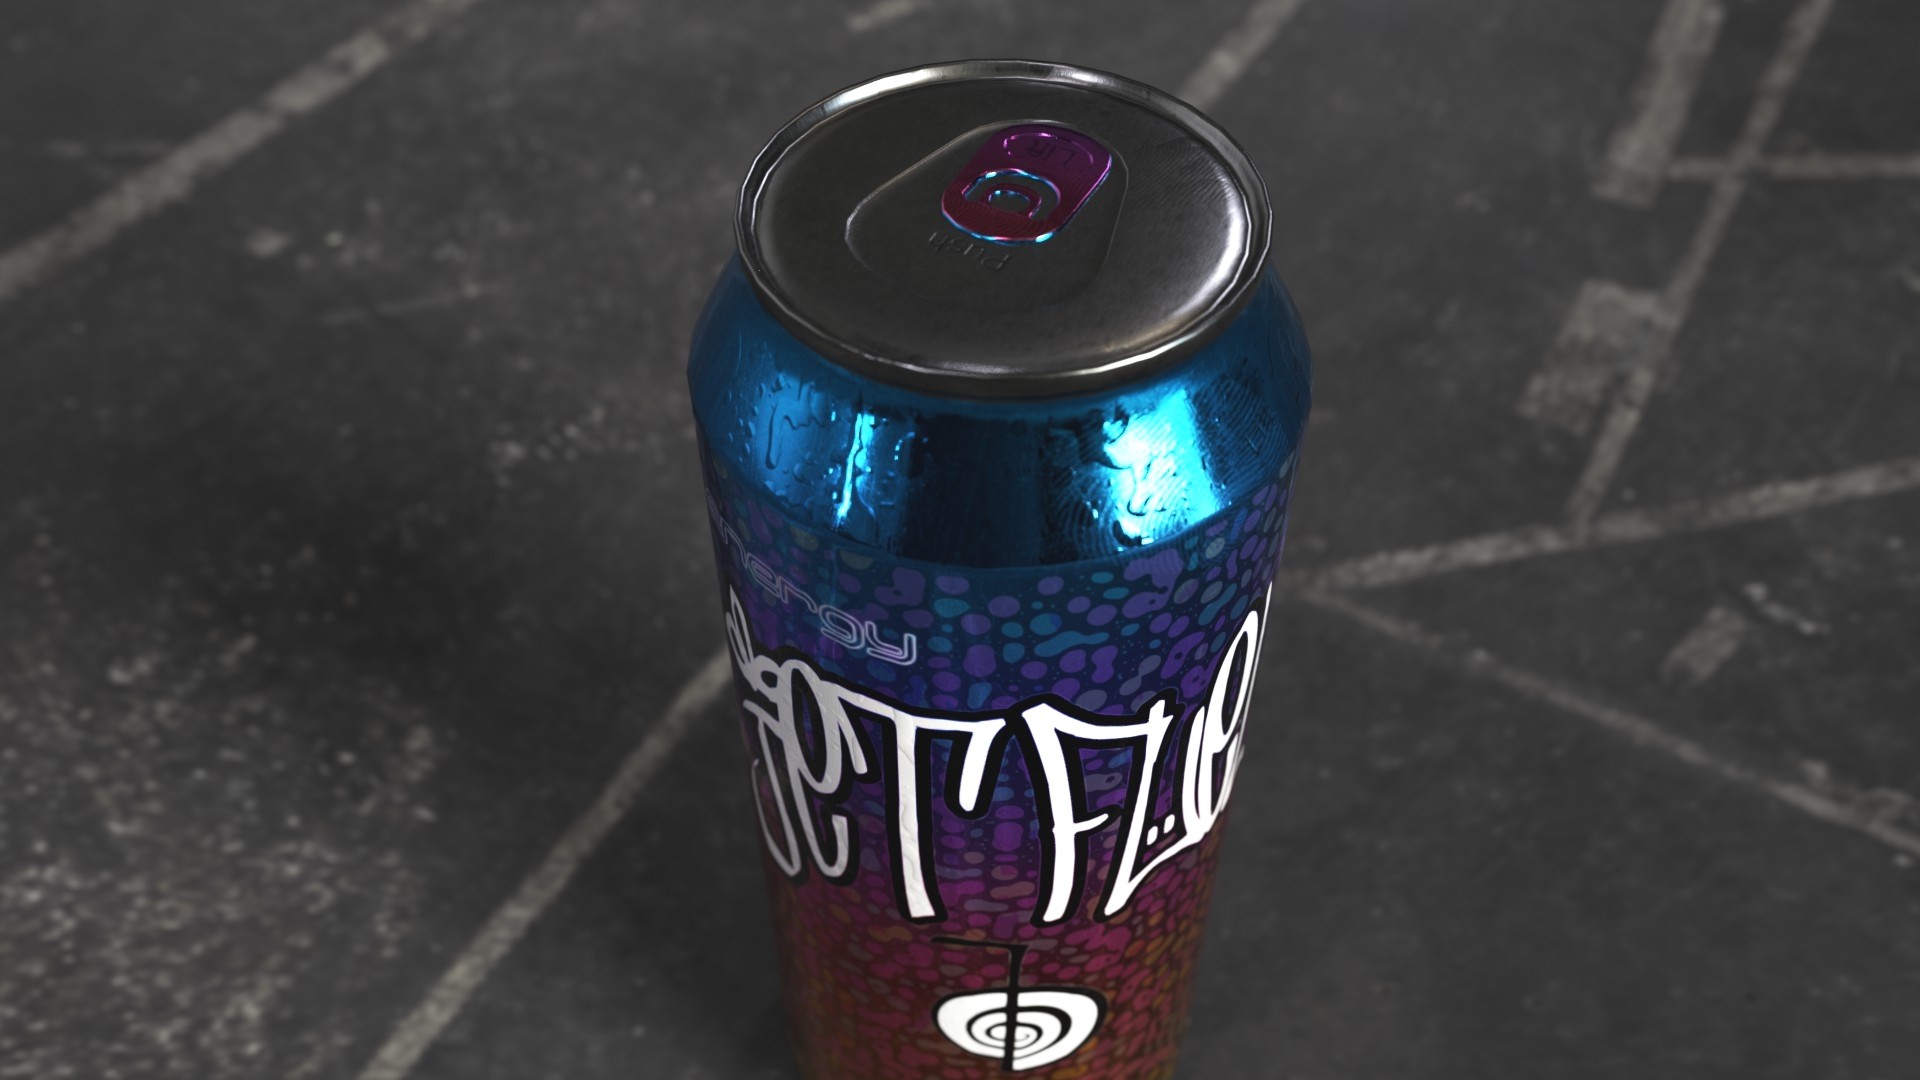
Time has come, to design some kind of logo (the hardest part for me)

My Idea was, to find something that stands for "power" and also resembles a turbine or a rocket.

After some research, I've found out about a "Reiki" symbol. It stands for "power" - and the swirl of it reminds of a turbine!

So i decided to pair it with the name of my fictive drink "Jet Fuel" to have something like a brand or logo on my can.

One side of the can was now kind of alive - but the other side - not.

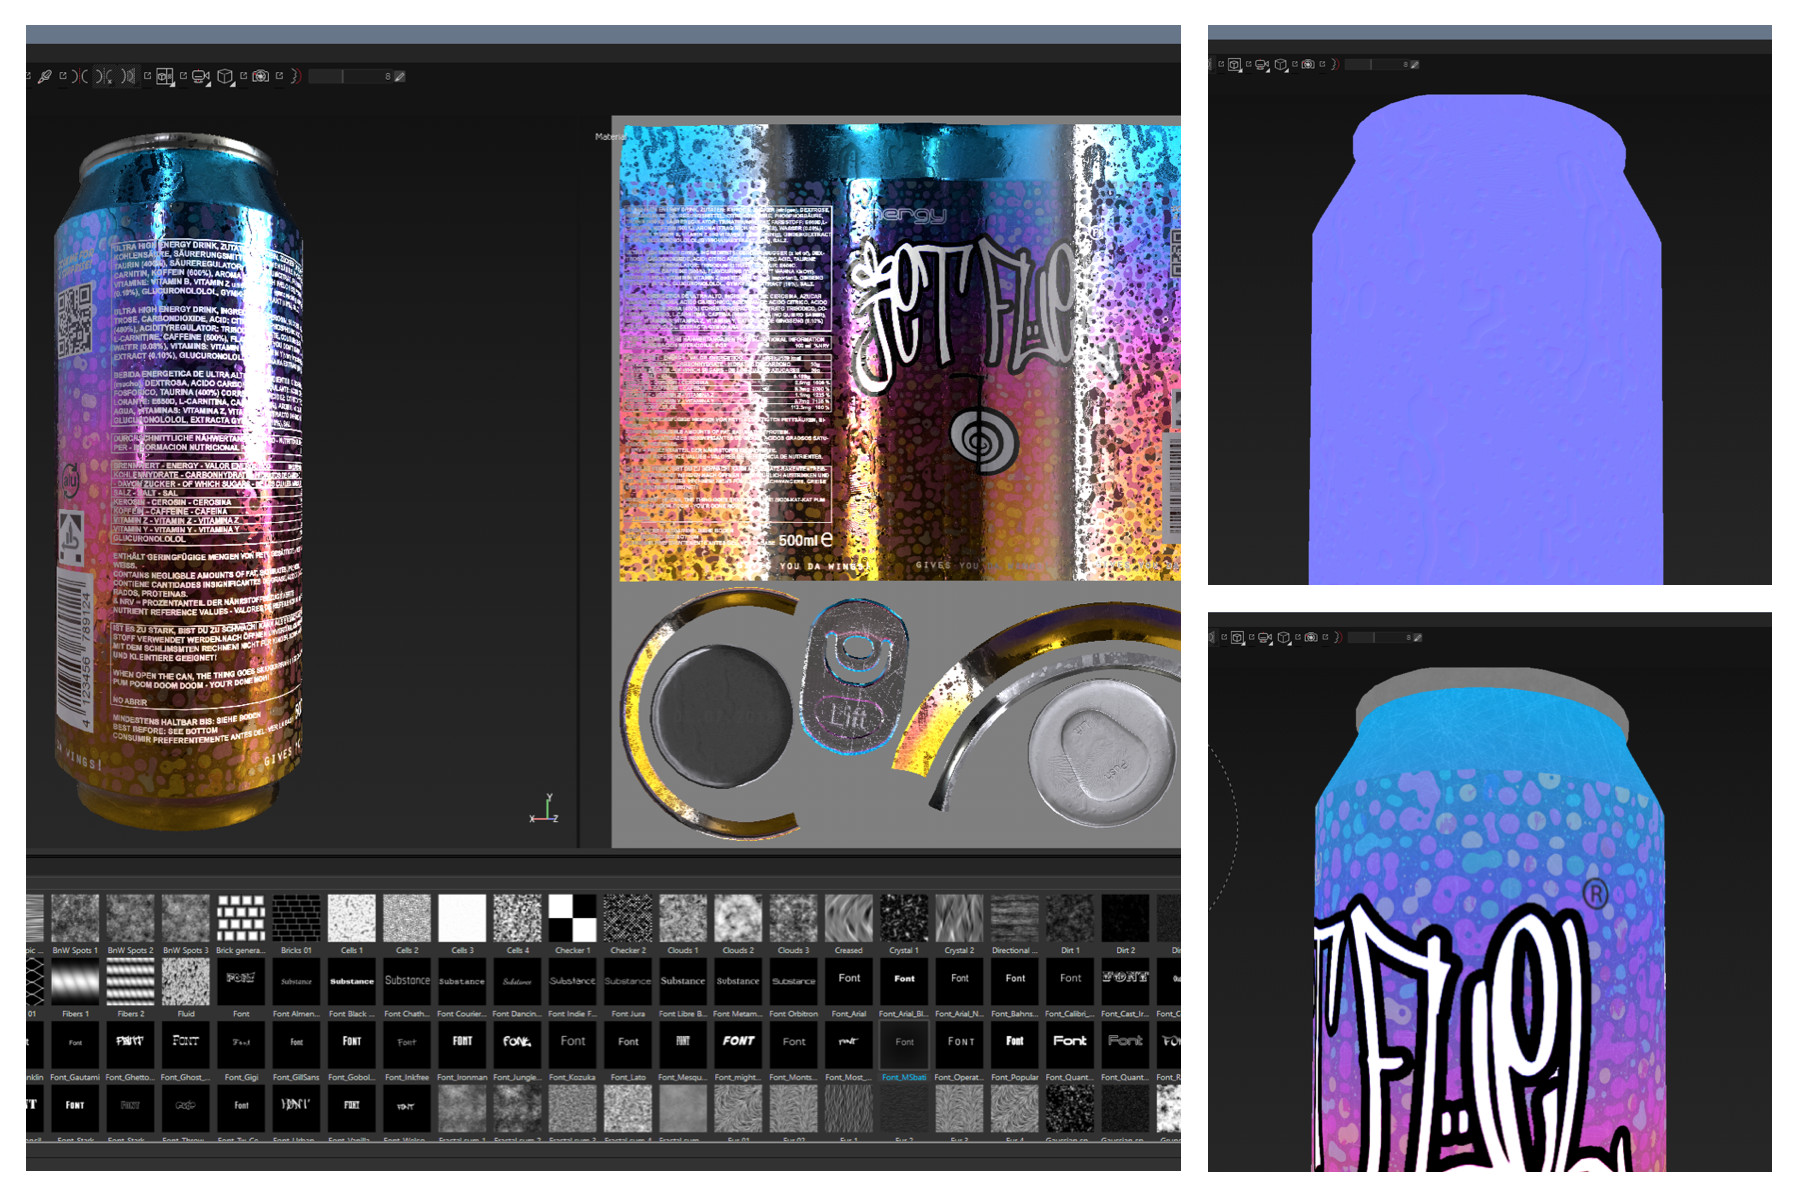
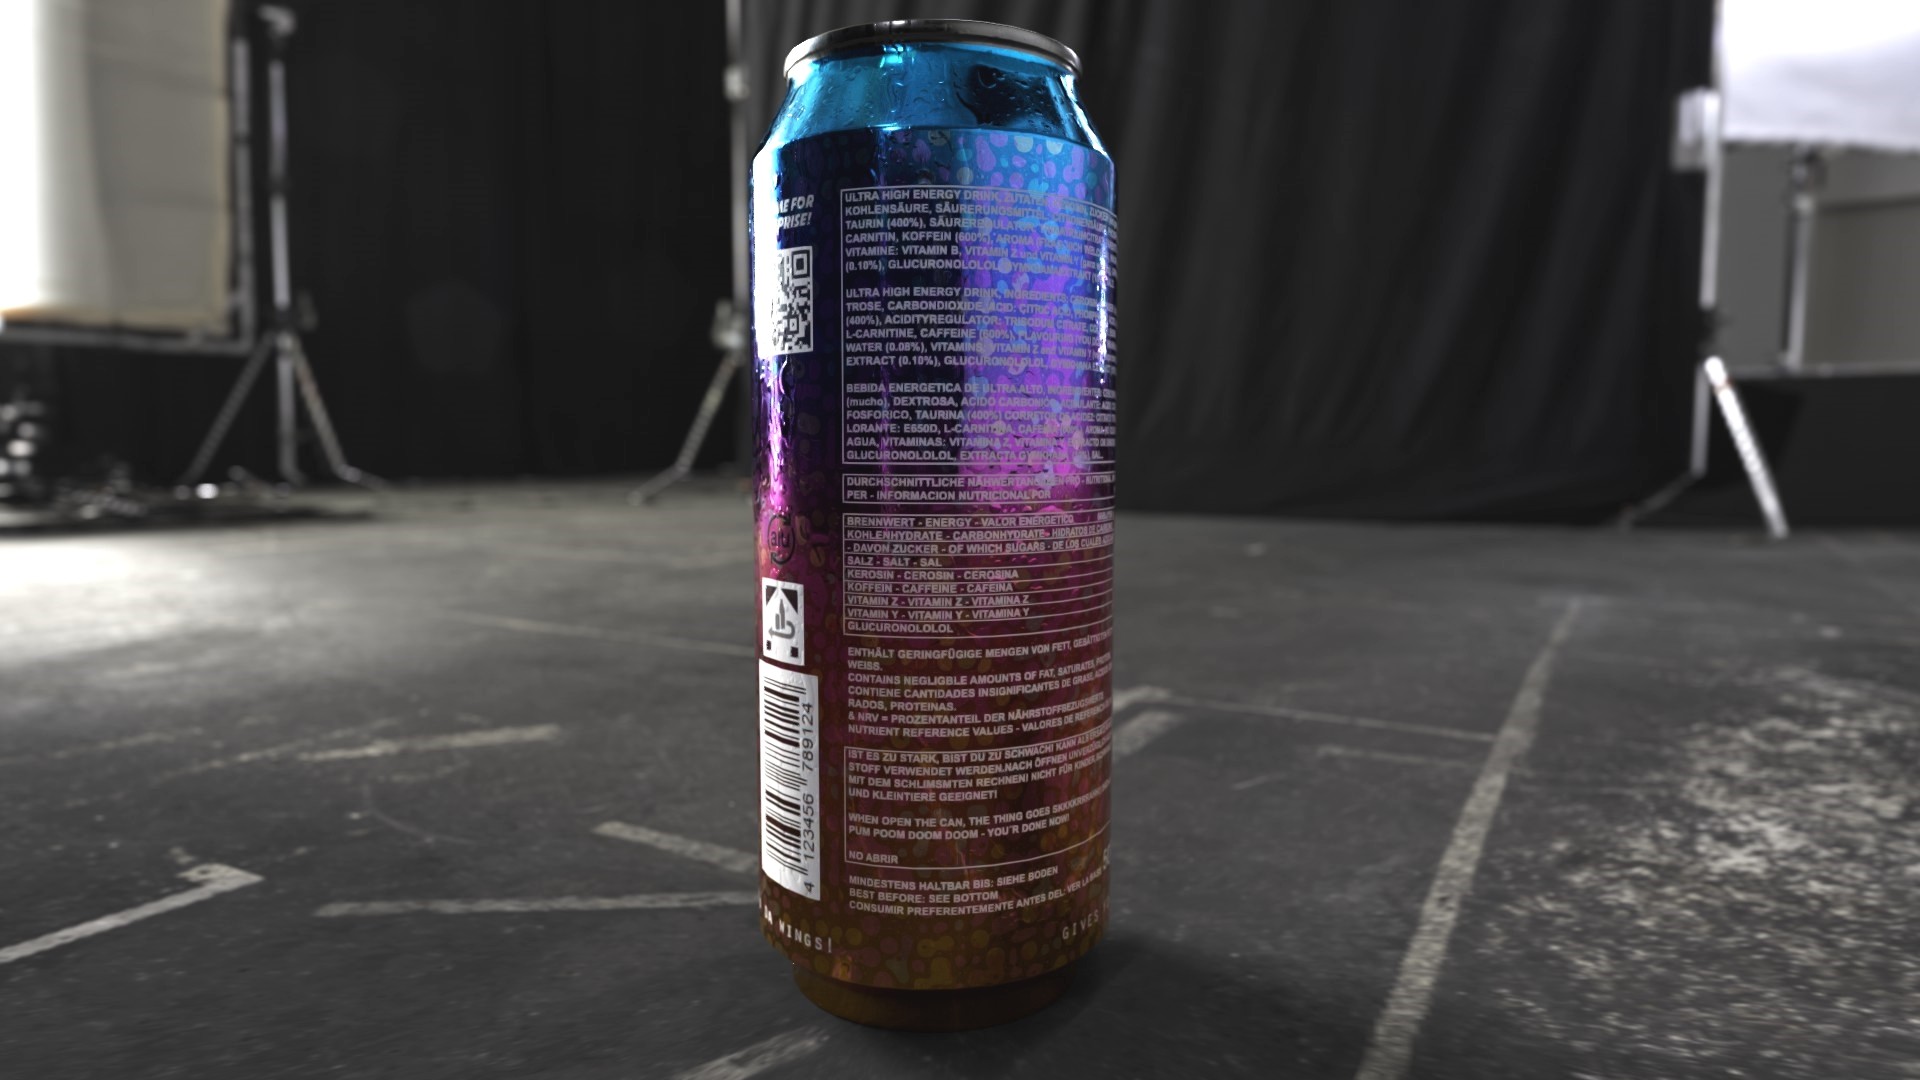
The next part took me quiet a while to finish: Nutrition Information, Barcode, QR Code, Symbols!

Oh my lord! I went with real world reference (in fact, the empty energy drinks in front of me) to get this done.

Ok - I broke with the reference here and there, regarding the Informations ;)


It was time to finish this asset with some final "touches" - literally! I put on some fingerprints here and there (painter alpha) and tweaked channels a lot. I decided, to go with miiinimal height and metal information only.

Because it's summer and cool, refreshing drinks are always welcome, I coated the can with some ice-cold condensed water.

For this one, only some channels were used, as well. Again, carefully tweaking and eyeballing was needed, to get the overall result, I was
going for.


 Substance Painter´s Viewport yields some nice results already

Another result of the setup was, the level of water condensation is tied to the camera and lighting!

So the can's surface can look more or less chilled, aka more or less water is condensed or already run down.


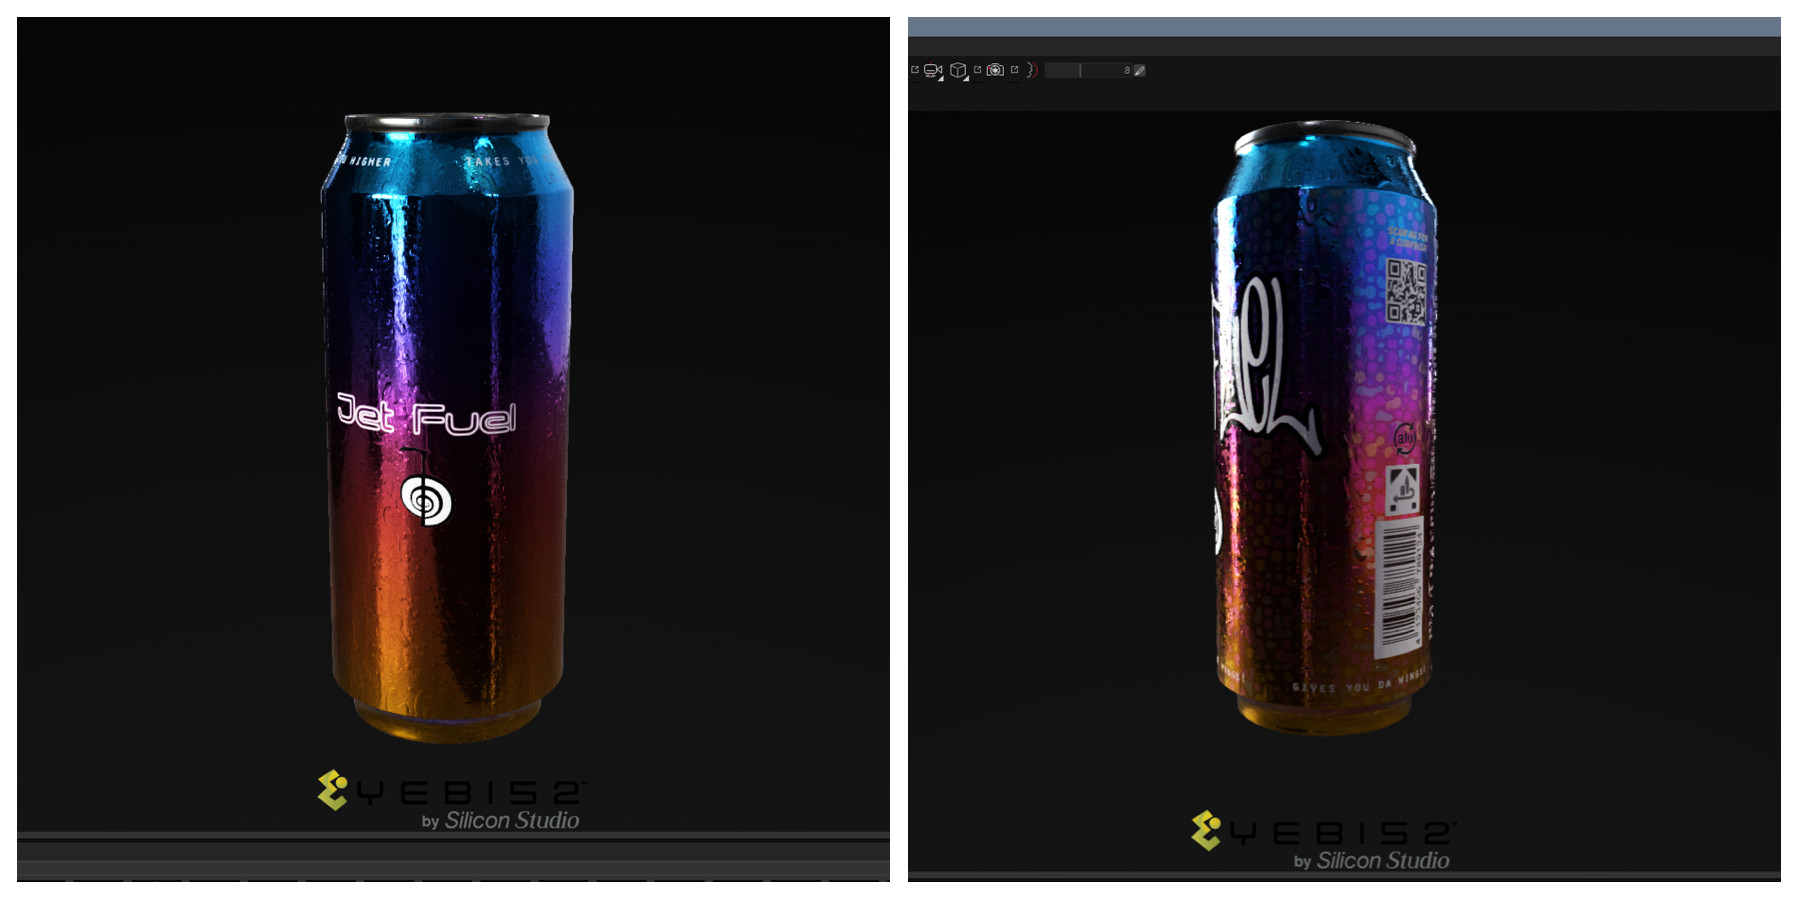
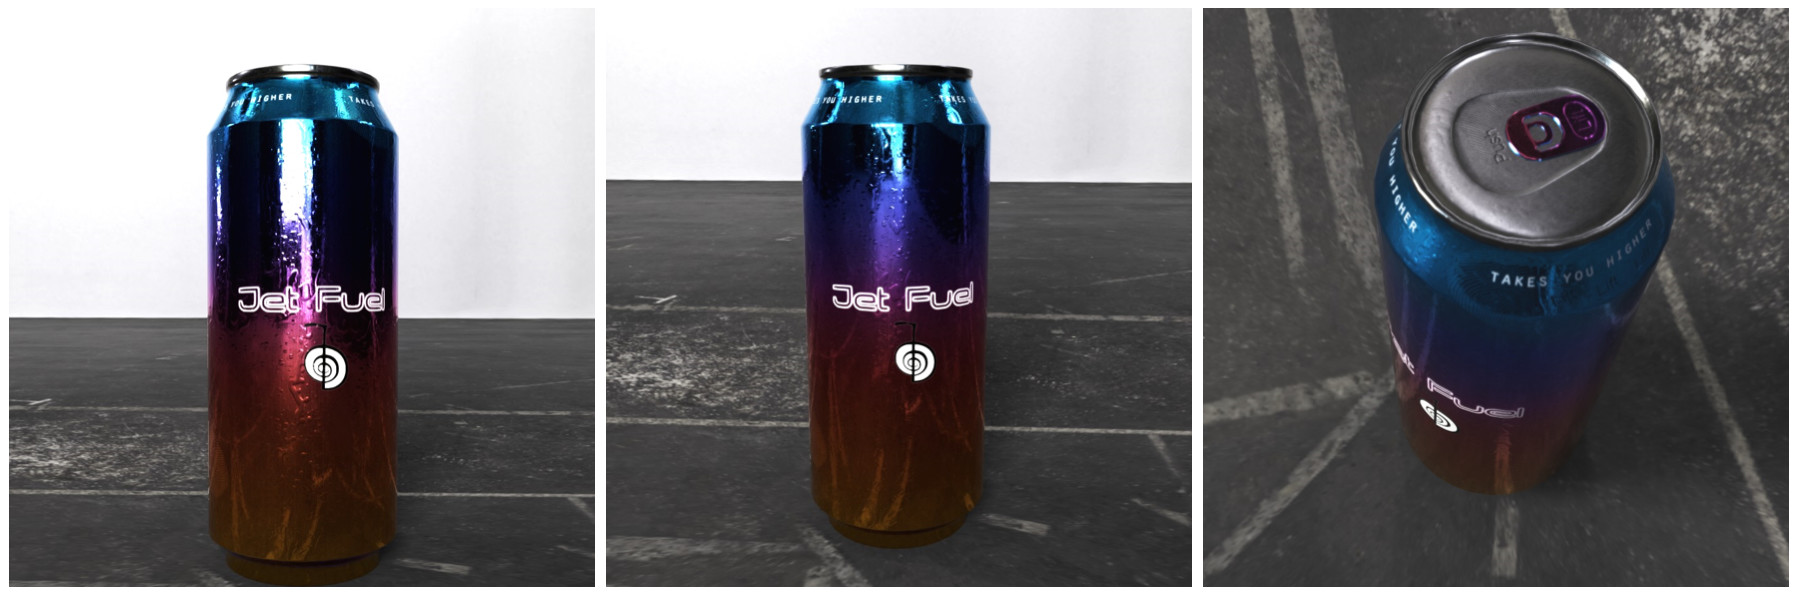
Now some iRay Render shots - enjoy!


Links to sketchfab: clean version and crazy bubble version


That's it for now - I hope, you've found it helpful and informative. Please leave a comment, if you feel like it.


Thanks for reading,

Karsten

... just starting up my new page :)

General / 30 June 2018

A lot of things are done, but some are still left to do - bringing this blog to life is one of them  :)

I am not that kind of "blogger-type" - but I think I can use this blog for some random things, that are not necessarily related to 3D and CG..


I wish a good day to everybody !